
Welcome to Quilt Street!
Sisters Choice Block

Sister’s Choice Block

DIFFICULTY LEVEL ‣ BEGINNER

FINISHED BLOCK SIZE: 10″ x 10″

This block is constructed with fast half-square triangle (HST) piecing as well as stitch-and-flip piecing. What a beautiful choice to make for a sister’s quilt! 

Instructions:

SPECIAL INSTRUCTIONS:

Read through entire pattern before beginning project. Use ¼” seam allowances with fabric right sides together. Pressing arrows are included with diagrams. Basic quiltmaking supplies are assumed. If working with directional prints or if you want a little room for insurance, you may want to begin with larger pieces than what we call for. 

HST = half-square triangle 


FABRIC:

Fabric A: 3″ x WOF strip white fabric 

Fabric B: 3″ x WOF strip red fabric 


ADDITIONAL SUPPLIES:

Marking pencil 


CUTTING:

From Fabric A, cut: 

• (2) 3″ x 3″ squares 

• (12) 2½” x 2½” squares 

From Fabric B, cut: 

• (2) 3″ x 3″ squares 

• (4) 2½” x 4½” rectangles 

• (5) 2½” x 2½” squares 


Instructional Video:

Fabrics are from the Tonga Mariposa Batiks Collection by Timeless Treasures including Dragonflies and Dancing Techno Dots. 

Block Assembly:

Draw a diagonal line on wrong side of (4) Fabric A 2½” squares. Referring to Diagram 1, place (1) Fabric A marked square onto (1) Fabric B 2½” x 4½” rectangle as shown. Sew together on drawn line. Trim corner ¼” from sewn line and press to make Rectangle Unit. Make 4. 
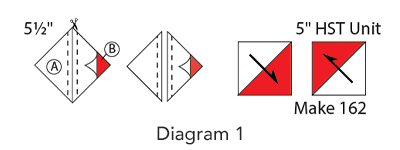
Bouncing Betty Quilt, Diagram 1

Referring to Diagram 2, draw a diagonal line on wrong side of (2) Fabric A 3″ squares. Place (1) Fabric A marked square onto (1) Fabric B 3″ square. Sew a ¼” seam allowance on each side of drawn line. Cut in half on drawn line and press. Trim each to 2½” square to make (2) HST Units. Make 4. 

Sisters Choice Block, Diagram 2

Paying attention to orientation, lay out (1) Fabric A 2½” square, (1) HST Unit and (1) Rectangle Unit as shown in Diagram 3. Sew together Fabric A square and HST Unit into a row. Sew rows together to make Corner Unit. Make 4. 

Sisters Choice Block, Diagram 3

Referring to Diagram 4, sew (1) Fabric A 2½” square to (1) Fabric B 2½” square to make Pieced Rectangle. Make 4. 

Sisters Choice Block, Diagram 4

Paying attention to orientation, lay out (4) Corner Units, (4) Pieced Rectangles, and (1) Fabric B 2½” square as shown in Diagram 5. Sew into rows. Sew rows together to make Sister’s Choice Block. 

Sisters Choice Block, Diagram 5

Shopping Cart
Scroll to Top